Foraging isn't always about bringing edible things home, in the Spirit of Christmas as well as this pheasant I brought home a big bundle of mistletoe to decorate the house;
As well as collecting mistletoe, the pheasant breasts will go into the multi bird roast that we are preparing for Christmas and other preparations have included preparing some rolled, stuffed venison joints;
There will be plenty of venison to share with friends and family and we've been preparing some goose crowns to share as well for family members who are tired of turkey every year;
Not all the game is being given away or saved for Christmas though;
There are still plenty of mushrooms to forage as well, although stroganoff is one of our favourite dishes to prepare with mushrooms a pheasant and mushroom carbonara was a delicious alternative;
The Christmas season is just as good a time as any other to enjoy wild food.
The Eickhorn Nordic Bushcraft (left) has been one of my favourite production bushcraft knives for about three years now. It's no longer in production but has really impressed me over the years and is still a knife I enjoy using.
It does have drawbacks though, the aluminium handle scales make it very cold and uncomfortable to use in cold weather and as I visit Scandinavia fairly frequently and the cold never stops me from getting out and doing some bushcraft so I needed to do something about the handle.
The original aluminium handle scales weren't uncomfortable other than in cold weather.
I'm not a great craftsman and there is a very good reason that most of my knives are either production made or made for me by someone else but I particularly like this knife and didn't want a relatively minor issue like the handle material put me off using it.
The handle scales were easy enough to remove with a torx bit, before my modifications the Eickhorn squirrel logo and designers name were visible on the ricasso but my new handle would cover them up allowing me to move my fingers closer to cutting edge, I also ground off the pronounced finger guard. I don't really like finger guards unless there is a very good reason for them, fighting knives or heavy duty chopping tools for example, they just get in the way for fine carving and most backwoods tasks.
I chose a piece of burgundy micarta with white and red liners for the new handle.
I secured the handle with epoxy between the various layers and then pinned it all in place with dowels made out of box wood.
The new handle does make the knife more comfortable to us in the cold but it doesn't make the knife itself any better. I prefer the way it looked before my modifications, the removal of the finger guard makes the handle look out of proportion to the rest of the knife but I do really like the layered handle and the way the liners turned out.
I don't have the time, skill or patience to get the finish I would expect on a production knife on the micarta handles of my project but I did achieve what I wanted.
I do like the way the handle liners look
The finger guard is gone and the ricasso is now partially covered by the new handle to allow me to grip it closer to the cutting edge.
While I can't boast the skill to make knives and knife handles to a particularly high standard I do enjoy tinkering with knife handles from time to time and personalising kit to meet your specific requirements is just a part of bushcraft.
I used to make a lot of knife handles, when I had more time on my hands and, and while my results were similarly mediocre to this project it was a lot of fun.
Some of the knife handles I made, over ten years ago now in my late teens and early 20's that I am most pleased with; this one is a small Bowie knife I made for my Dad with a handle of Puriri wood I brought back from New Zealand, brass and buffalo horn bolster and a home made mosaic pin.
A little whittling knife that I gave to my brother for his eighth birthday made of mahogany and rose.
In January you will get to read the full review of a product martin has been using recently one of his deer rifles, as you can tell from this little preview he is quite excited about it. Check out our usual gear review post in January for a full account.
It's never too late to have one of those "I wish I'd known about this 20 years ago" moments and I just had one! I'm 61 next birthday and have fired many weapons in a variety of disciplines and situations and I can't think of one in which the aim point micro H-2 wouldn't have made me a better shot. I grew up with small bore rifle and a lot of shot gunning for pest control and on my best days, I was good but never great. The military had me shooting with assault rifles and sub machine guns as well as an assortment of man portable antitank weapons and once again, the aim point would have been brilliant in all but the pure long range applications.
My other love, whilst the military encouraged it and civilians tolerated it, was pistol shooting. Tragedy bought that to an unnecessary and abrupt end but without doubt, this too would have benefited from an aim point micro with its pinpoint accuracy and 'both eyes open' capability, I only wish I'd had the opportunity to try it! But alas, those opportunities have gone and unlikely to return. The one I do have though, is to put it on a short, light and fast handling deer rifle for woodland stalking.
Watch this space for my experiences in the cambridgeshire woodlands, shooting Muntjac, Chinese Water Deer and Roe. See you in the woods! MG
After working late in to the night making repairs to our
little forest range, there seemed little point in driving home for 3 hours
sleep, just to turn around and come back in the morning, so I lit a lovely
blazing fire and had a brew before sliding in to my sleeping bag at Midnight.
The air was already below zero but I had been working hard, was warmed by the
fire and knew that I was exhausted enough to get a fantastic night’s sleep.
I
was right to some extent, I was really cosy in the sleeping bag and I went ‘out
like a light’ and slept very soundly until about three in the morning! After
the 3 hours’ sleep I could have had at home in bed, I awoke to find my
extremities very cold indeed! There was nothing for it but to get up, stoke the
fire and have another brew before trudging off into the darkness for an early
session in the high seat.
The walk, the multiple layers, the car journey and exertions
had warmed me for a while as I trudged in over noisy ice covered puddles and
finally took my seat and loaded up ready for the long wait.
The inactivity soon had me thoroughly cooled down again and
as the light gathered I could see frost forming on my barrel and moderator! There
was no choice but to sit and shiver whilst I continued my vigil.
I heard the unmistakeable barking of a Muntjac about a 150
yards away then, a little later, I spotted a couple of Roe does in the distance
but then on one of my innumerable scans with the binoculars, I caught a glimpse
of something that hadn’t been there before. Your eyes and the light can play
tricks sometimes but I was sure this was something real and as I focussed and
scrutinised the spot, I realised it was a fox. I hadn’t come for a fox but as I
watched its slow progress along the edge of the field, I knew exactly where he
was heading, he was off to the breakfast bar which we call pheasant pens. We
‘share’ this piece of wood with a little syndicate who have a few pheasants and
out of good neighbourliness, I couldn’t let Charlie go and wreak havoc in their
pens, I remember all too well the night a fox took my last 4 chickens. So even
though I knew that my deer vigil was over when I pulled the trigger on Charlie,
it was a choice that had to be made.
I squirmed around in the seat to rest the rifle on a side
rail and began to watch him through the scope, I was comfortable and the next
time he stopped, it was going to be his last stop! He made a 90 degree left
turn and disappeared in the blink of an eye. Still certain as to his
destination, I started my ‘distressed rabbit’ squeak and thankfully he
reappeared just as quickly but a few yards closer. I was watching more intently
through the scope now and the safety was off, ready for the shot, he was at
about 65 yards and all thoughts of deer had gone.
I will never know if a deer was going to show up, so I made
a choice based on my neighbour’s pheasants and I’m content with that.
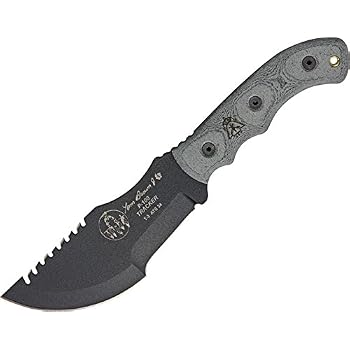
Produced by Lion Steel in Italy for Mr. Blade the S-Hardy is designed as a robust cutting and chopping tool, that will easily take on the toughest of jobs. The blade is of D2 tool steel and is described by the manufacturer as a modified tanto-recurve shape. It's not truly a re-curve blade though as the point in the blade where the grind angle changes forms a sort of 'tooth' and isn't a completely smooth curve. It's a little reminiscent of the blade shape of the Tom Brown Tracker knife although the 'tooth' isn't as pronounced or aggressive.
It's similarity with the Tracker is one of the reasons for this review, I am very critical of the design of the Tracker and really can't understand the rationale for the design or why an outdoorsman as celebrated as Tom Brown Jr. would advocate it's use when all my considerable outdoors experience indicates that it would be a poor choice for a backwoods tool. In my posts about the design process of my own bushcraft knife I wrote a little about the Tracker and other iconic bushcraft knives;
"As well as his [Tom Brown Jr's] incredible, unbelievable, claims about his experiences I just can't take anyone seriously who puts their name on a knife like this and claims that it is anything other than a heavy duty chopping tool. It's massively heavy and features a weird dog tooth which seems to have been adopted in a few other knife patterns since it first appeared on the tracker. This feature interrupts the edge of the knife meaning the section closest to the handle can really only be used for push cuts, a knife with a continuous curve or even a strait section which seamlessly curves up at the point doesn't snag on the material you are cutting and is easy to sharpen, unlike the tracker. The saw on the back is a gimmick and doesn't cut properly although this is explained away by the designers, manufacturers and fans saying that it was only ever designed to produce clean square edged notches for trap making. My questions to them are first; show me what use those perfectly square notches are? Second; if you are skilled with a knife aren't those notches just as easy to make with the blade of a knife? Third; why add a feature that detracts from the overall utility of the knife by making it uncomfortable to apply pressure to the back of the blade?
So you can see that I'm not a fan of the Tracker, nor of the feature that the S-Hardy shares with it, but I wanted to see how this particular knife performs and to try a new knife company that I hadn't heard of before.
First of all it came in a box with a very cool logo
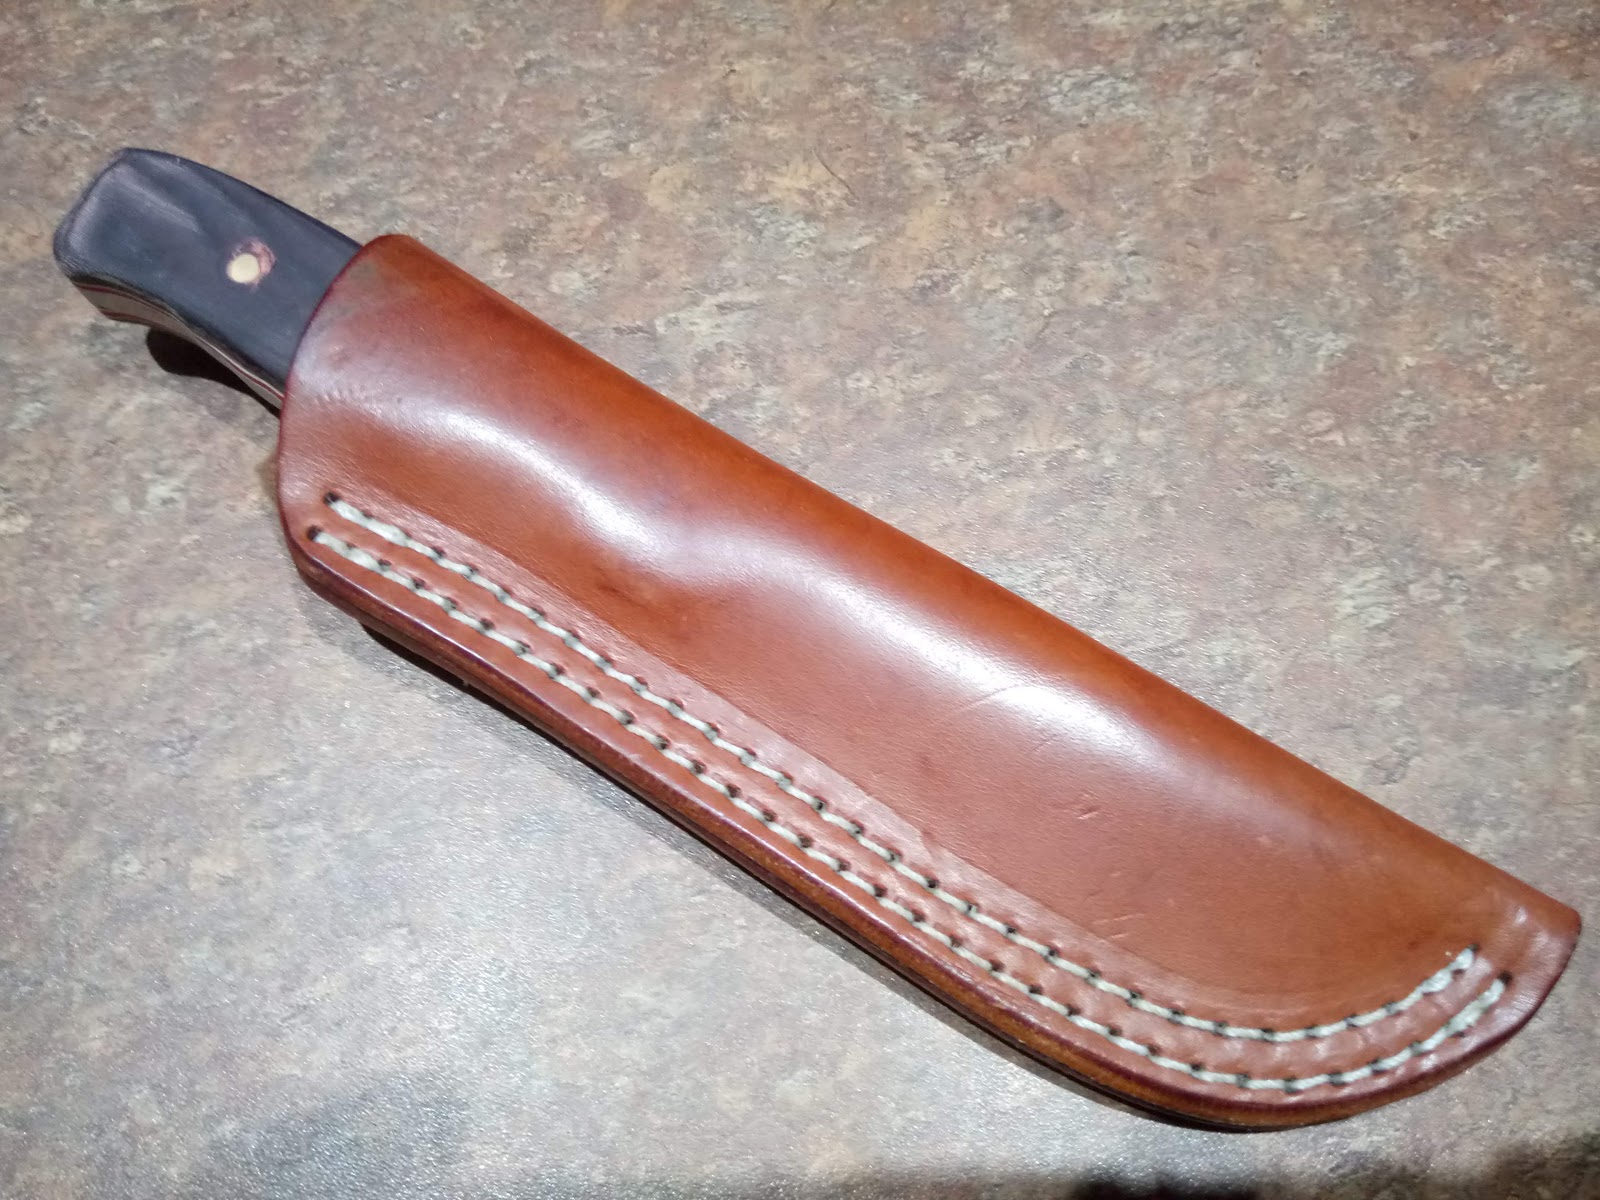
It comes with a very well made leather sheath which honestly is a little fancy for my taste, I like plain sheaths and the white stitching and two tone leather is a little decadent for me, also the retention strap for the handle is eventually going to be cut through where the swell at the front of the blade catches it every time the knife is drawn and sheathed. With the slightly unusual blade shape it's not a knife that will fit in an aftermarket pouch sheath which is often what happens to my knives like the Extrema Ratio Scout 1 which I re-sheathed in a Sharpshooter pouch sheath rather than the nylon MOLLE sheath it arrived with.
You can see that the 'dog tooth' section of the blade runs across the retention strap every time the knife is drawn it wont take long for it to be cut through entirely.
It is an attractive package though and I can't complain about it's performance, it feather sticks well and it's 5.27 inch blade is great for battoning and light chopping.
The weight forward blade makes light chopping duties a breeze, much easier than it would be with similar sized knives with a more standard blade shape. However where it excels at chopping, and I need to reiterate that it excels at LIGHT CHOPPING, if you want to really chop get an axe. By light chopping I mean chopping things between a few mm's to an inch or two across or possibly using a baton to drive the blade through some larger wood but it is NOT as people claim of knives like the Tom Brown Tracker a substitute for an axe or even comparable with the cutting power of a small hatchet.
While the S-Hardy is good for the heavier tasks required of a bushcraft or survival knife it does become uncomfortable after extended use, not so uncomfortable that it's a major problem but the handle cut out toward the back of the handle irritates and fatigues my pinky finger and the palm of my hand. I get the same issue during extended fine carving tasks and it falls down in that area as the false top edge makes it difficult and uncomfortable to apply pressure to the top of the blade during fine carving. Also the longer blade makes it difficult to span the knife with your hand and use you thumb on top of the blade to support cuts.
While the 'modified tanto' shape does bring the knife to a sharp point, something I look for in every knife I use, the blade quickly broadens out and it quickly goes from a fine point to over an inch thick so it really can't do the fine carving that I consider an acid test of bushcraft knives.
One of these 'acid test' tasks I do with all the knives you'll see tested here is to carve a netting needle and unfortunately the S-Hardy did not perform well in this regard, mainly because of that fairly broad blade which levers apart the wood fibres as you try to make small cuts on the inside edges of the needle;
It was almost impossible to put a smooth finish on the inside angles and edges of the needle and the more I tried, especially down at the base of the needle the wood just split ruining my efforts. The needle was functional but not tidy and would have been a pain to use as the rough edges would have caught and snagged on the fibres you use to make a net.
I can't fault the quality or the choice of materials for this knife, although I'm less impressed with the sheath for reasons I've already stated. I like D2 steel in general and can't fault it even though I'm fully aware that there are more impressive steels out there. The handle can be uncomfortable as I've mentioned and it will cause you some discomfort if you use it for extended periods and it really isn't a fine carving tool where it excels is light chopping, battoning and much to my surprise feather sticking. I was concerned that the dog tooth edge would get in the way when feather sticking but there is just enough blade length between the choil and tooth to get decent feathers but you won't get the use of the full length of the blade when feathering or carving due to that tooth which in a more general purpose knife is a bit of a waste of a blade.
Because we've dwelt on the S-Hardys ability to make feather sticks todays lesson linked with this review will be on feather sticks;
Feather sticks are simply aids to lighting a fire, without small tinder such as dry grass, matchstick thin dry twigs, dry nettle and hogweed stems etc... you need to make fine tinder. This is particularly important in winter when dry material is often sodden or buried in snow. Select some dead dry wood, this will often be found on dead limbs or hung up in trees, if you have a saw cut it to ten to twelve inch lengths, if not you can use a batton to nibble through it with your knife or as it's dry break it against a tree or rock.
Now split it with your axe or hatchet or batton through it lengthwise with your knife, for perfect feather sticks aim to split your wood down into pieces roughly an inch square. Now you can feather each of these pieces and you will need a pile of them to get a decent fire going, half a dozen or so would be ideal. You should be aiming to get the remaining wood so thin that the fat end of the feather stick will light from the feathers, you don't want to just burn off the feathers you want the whole lot to catch light and form the basis of your fire.
One of those 'model' feather sticks that you can find online or in some poorly written and researched survival guides, these curls would all burn off before the rest of the wood catches and looking at how curly they aren't this is probably made of wet wood. Wet wood doesn't curl nicely like dry wood does.
To achieve good feather sticks I carve feathers on three side of the wood, some say you should only do it one but ultimately it doesn't matter. You have two choices when doing the actual carving, you can brace the wood and move the knife along it's length and you do want to carve along the whole length of the wood, just because all the feathers curl up at one end doesn't mean you start carving at that end you need a dense mass of curls and to get that you start carving at the tip and let the curls form at the bottom. Alternatively you can fix your knife in one place and draw the wood against it. I prefer the first method as I can employ the whole length of the blade which allows me to form curls more easily and use the full curve of the knife blade.
Lighting a fire with feather sticks, most of the curls have already burned away but the fire is still burning because the sticks were whittled thin enough
Feather sticks on the banks of a frozen lake in Sweden
For the full fire lighting process including feather stick making have a look at this video of mine from a few years ago;
So that's it for this months review, the Mr. Blade S-Hardy and feather sticks, I hope you enjoyed it and you can look forward to a more detailed lesson about feather sticks as we build on the Bushcraft Basics pages.
At this time of year we are very lucky as foragers and wild food enthusiasts to have plenty of game and fungi available;
Cellophane wrapped, battery farmed chicken can't compete with these roast pheasants for Sunday dinner.
And I've rarely had steak anywhere that can compete with these venison steaks;
Crusted with crushed chillies and herbs The plate is waiting for it's steak Delicious
Sometimes game and fungi can be married together in a single delicious dish;
Wood blewits and field mushrooms that my son found on his way to school, we added them to a venison chilli and it was fantastic;
Finely diced venison ready for making chilli, the knife in the picture is an Extrema Ratio Scout and you can read a full review of it HERE that we posted earlier this month.
Ready to add the mushrooms to the chilli.
At other times the mushrooms can stand on their own feet;
A great haul of shaggy parasols and oyster mushrooms with a couple of blewits and common ink caps.
My children love helping chop up our foraged mushrooms.
A delicious stroganoff is one of our favourite things to make with foraged fungi.
As well as game meat and fungi there are a few late fruits to harvest including black nightshade. They are an edible member of the nightshade family and taste like very sweet tomatoes but are small and black. They can be easily distinguished from the deadly nightshade, which also has a black berry, as black nightshade berries grow in small clusters rather than a single berry like the deadly nightshade.


